Here at Sliced Bread Animation, we’ve worked on a range of different immersive VR experiences, from venturing inside the human heart to fire safety training in the workplace. In order to create these experiences, we need to use what’s called the ‘Developer Mode’ on the oculus headset.
The developer mode allows us to ‘sideload’ our projects, which means we can get our content onto the Oculus without having to go through the Oculus store. The Developer Mode is a great setting that makes it easier for us to create these virtual worlds. However the process of turning on developer mode on the Oculus is more complicated than it sounds. So here is our guide for setting up developer mode on your headset.
Before we begin, this guide is for those who already have an Oculus Quest 2 set up, which means an already established Facebook account and a linked Oculus account and app.
The first step is to follow the link to the Device Setup Documentation page.
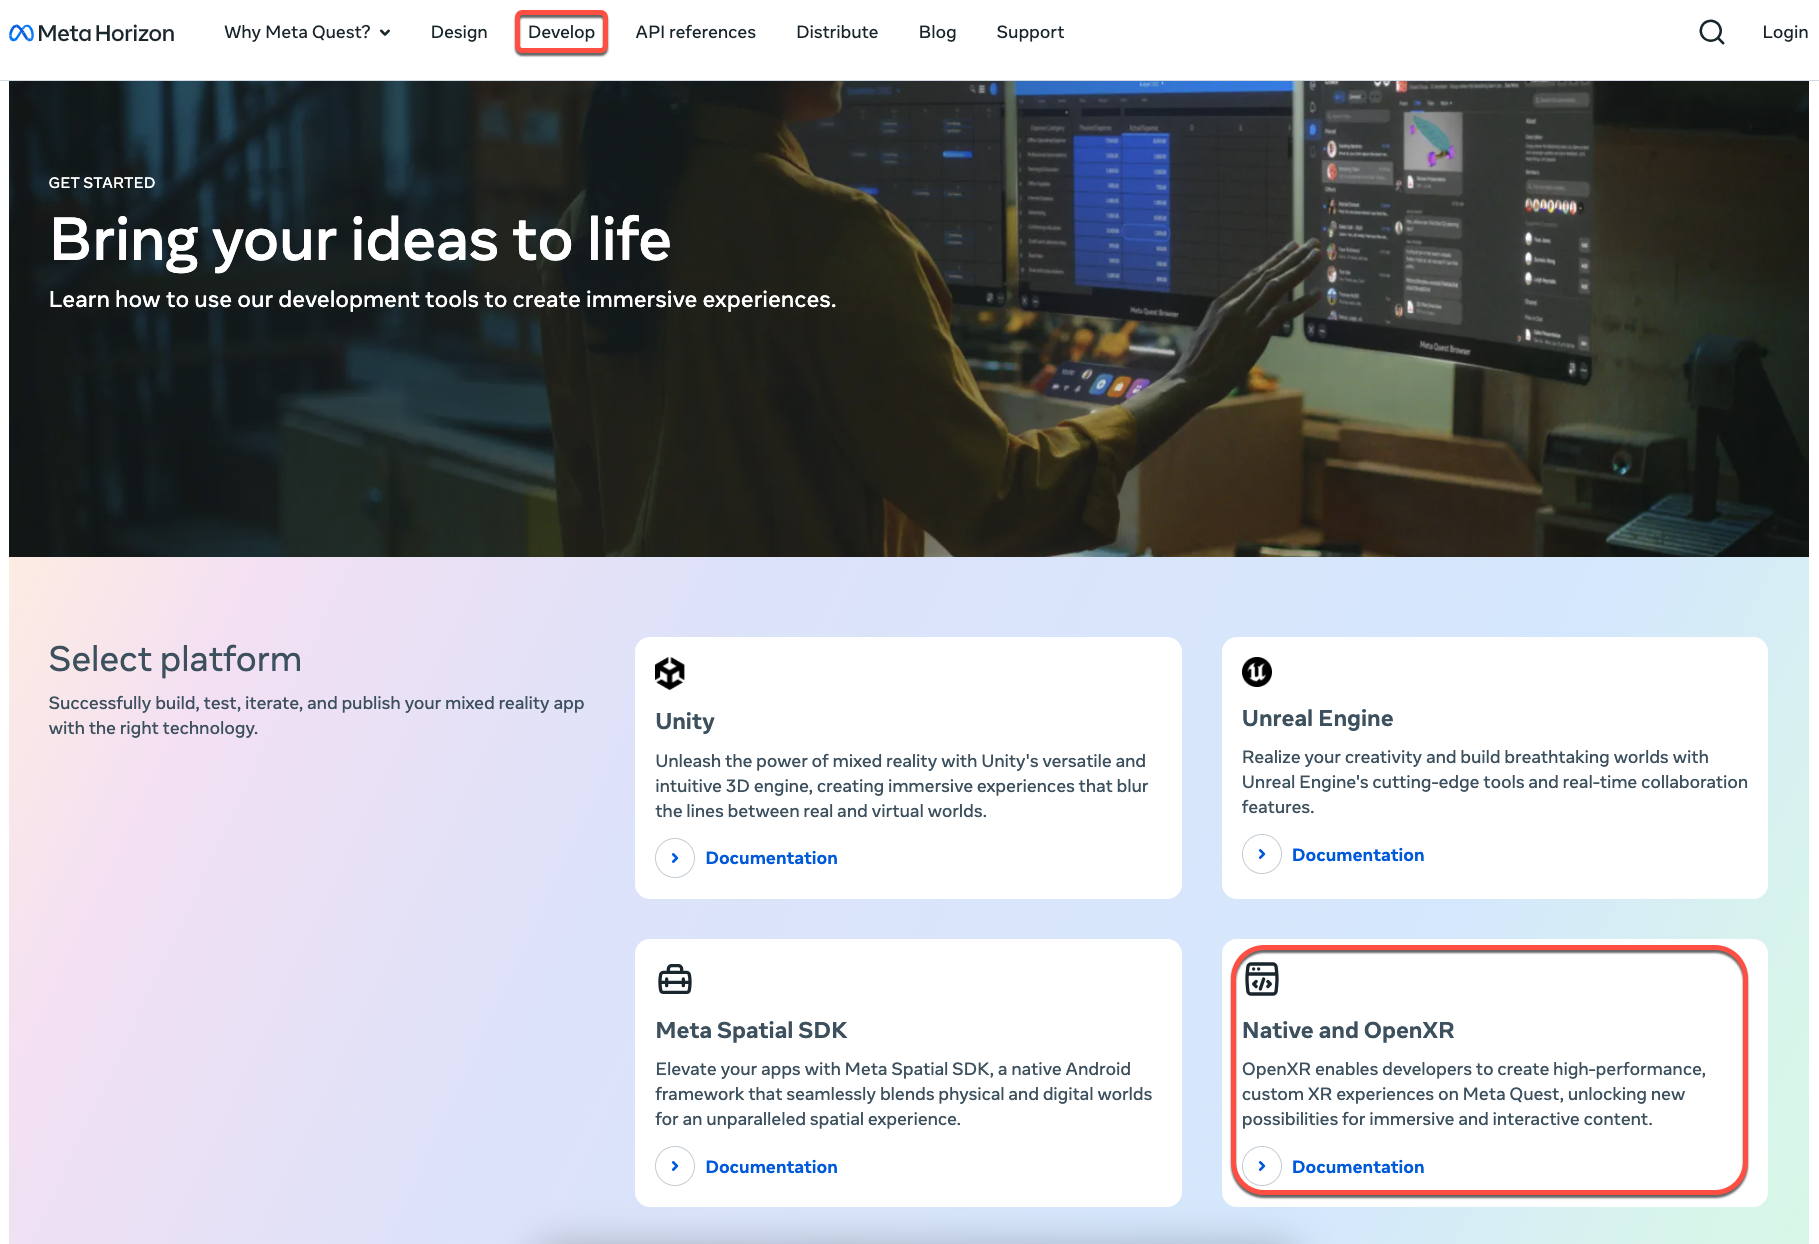
Alternatively, navigate to Meta Horizon > ‘Develop’ > ‘Native and OpenXR Documentation’.
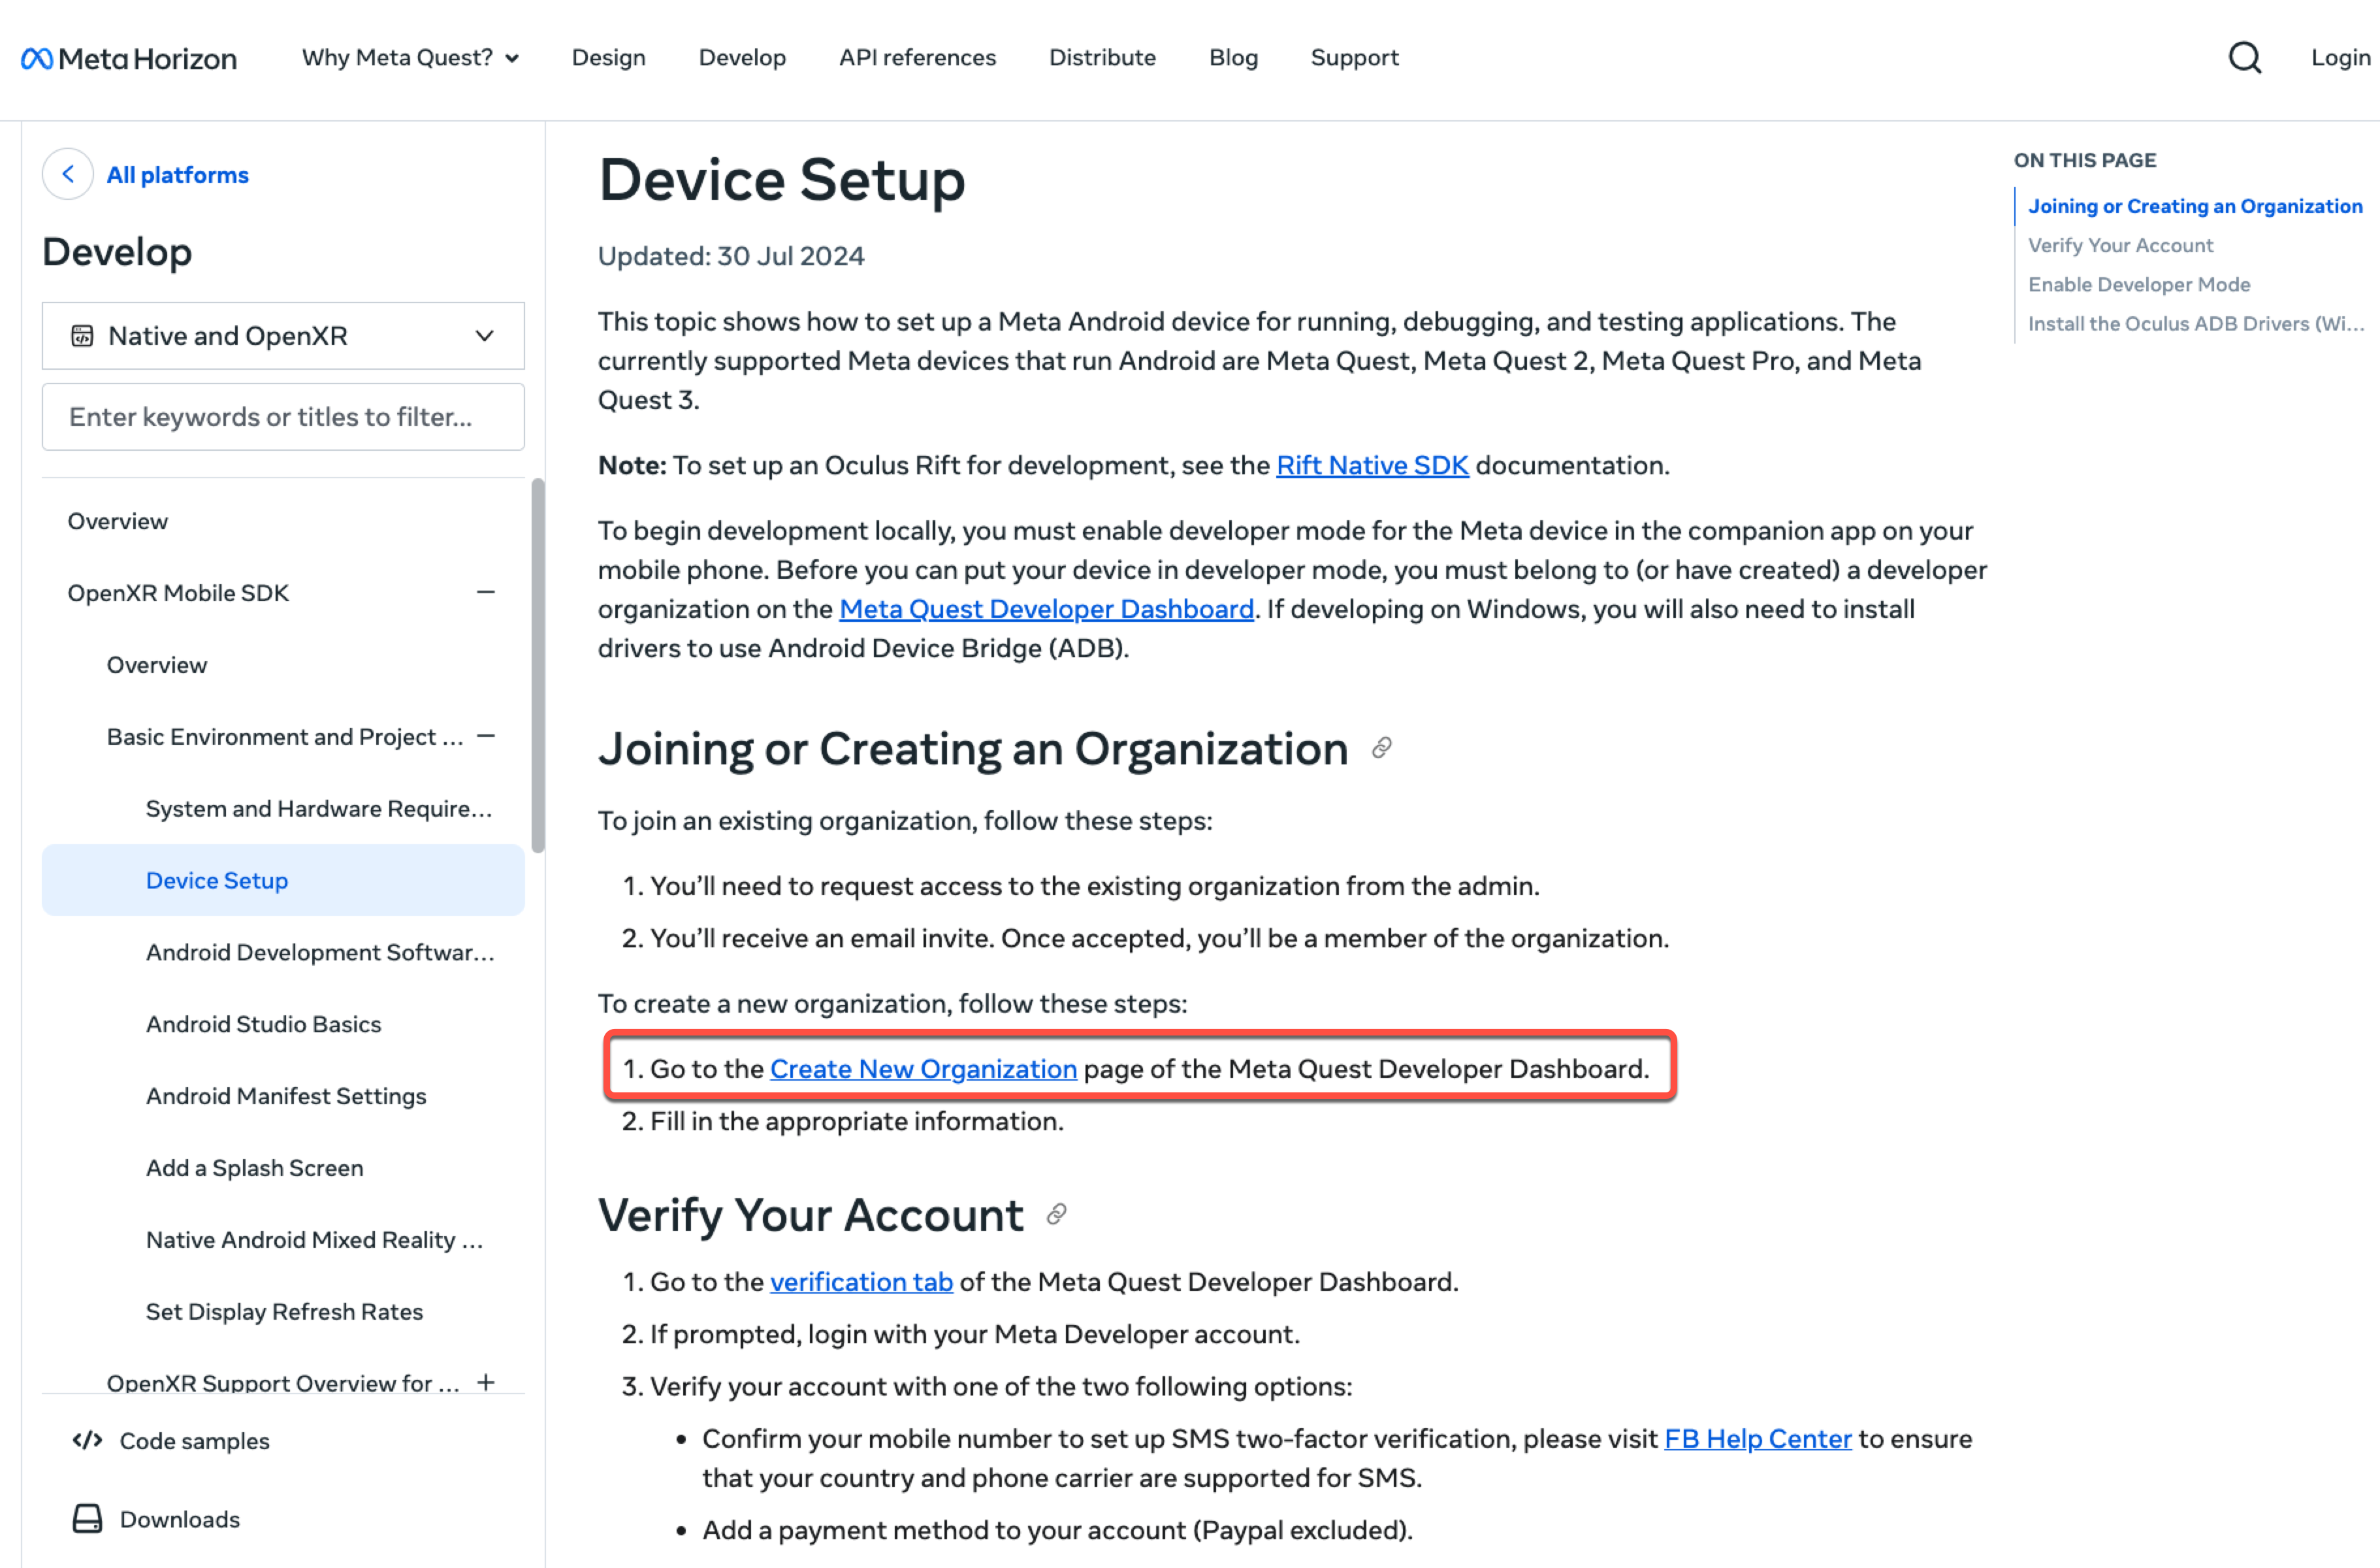
On the left hand side of the page will be a number of different options, click on the words ‘OpenXR Mobile SDK’. This should now reveal a drop down with a few more options, you now need to click on ‘Basic Environment and Project Setup’ > ‘Device Setup’.
You’ll be able to see a detailed guide on how to set up your device in Developer Mode, pay attention to the section titled ‘Joining or Creating an Organisation’. Click on ‘Create New Organisation’ link. This will take you to the Meta Developers Dashboard where you can create your developer account.
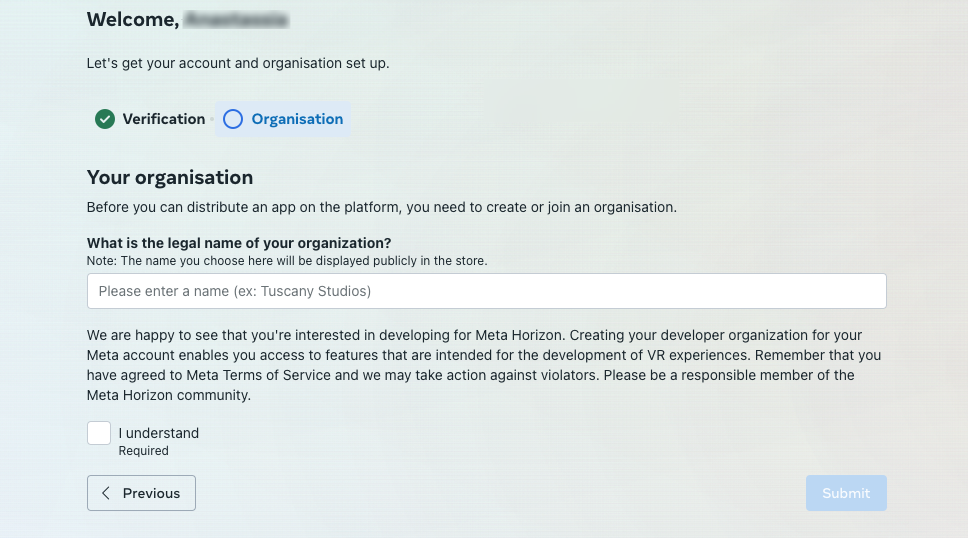
To create a developer account you need to create an organisation and verify your account, both of which are necessary to turn on developer mode. The organisation name is only important if you choose to sell what you make commercially, however if this isn’t the case then you can put whatever you like as the organisation name.
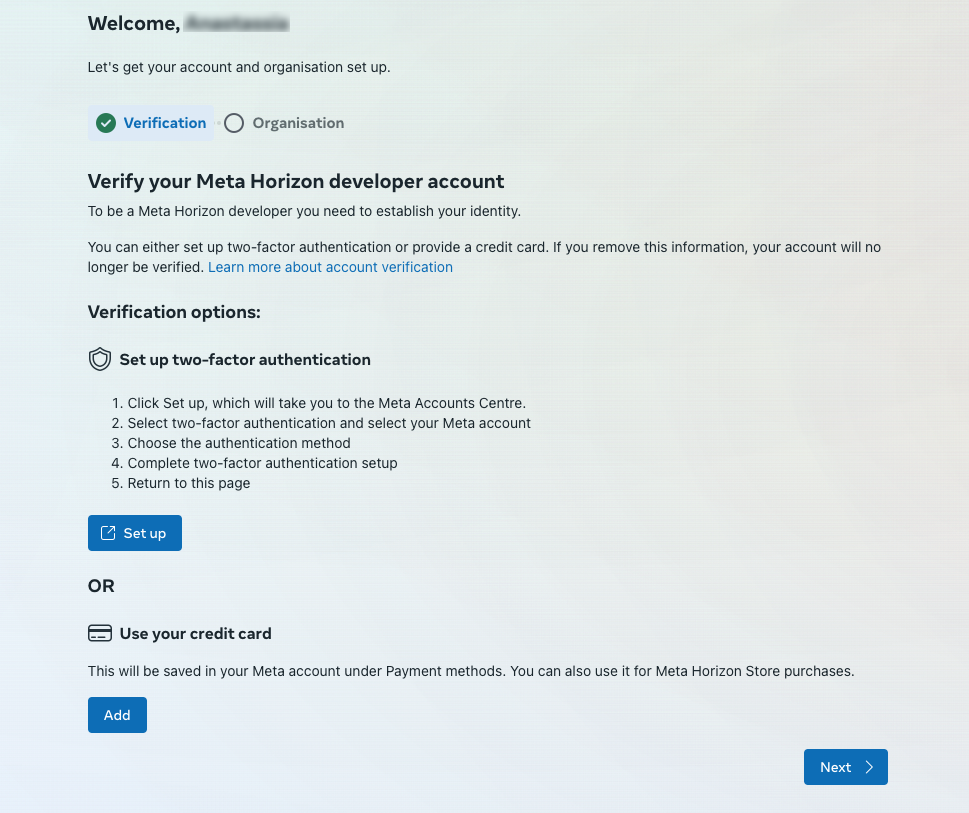
Next you’ll need to verify your account, this can be done by either adding your card details, or by setting up two factor authentication using a phone number; pick whichever works best for you. You should be notified on the web page, or by email if you were successfully verified.
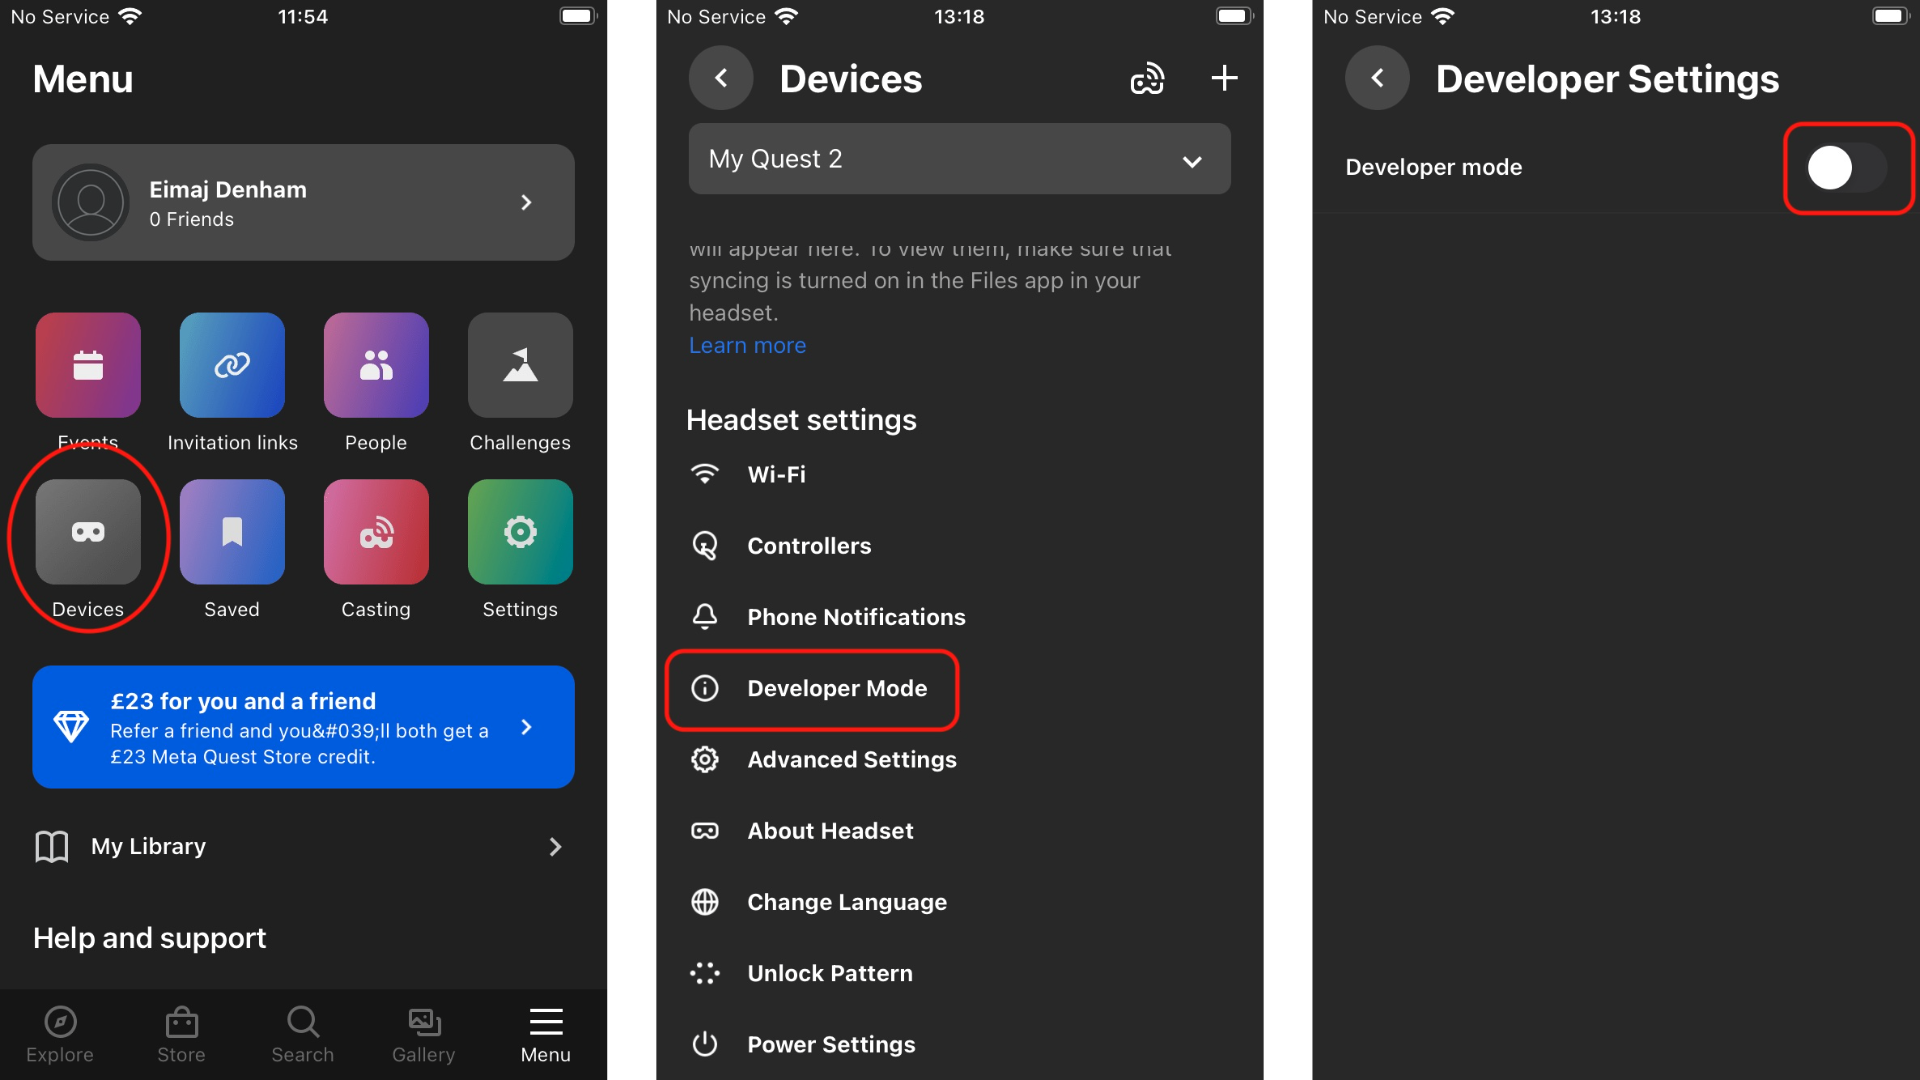
If you have correctly set up a developer account then you can now turn your Quest 2 on to ‘Developer Mode’. To do this all you need to do is go on to the oculus app and head to the menu. Then go to devices and find your headset, click on the headset you’d like to turn on to developer mode and scroll down to the settings. You should see the option ‘Developer Mode’, click on this then slide the button to turn it on!
