It is said that creating and developing a game takes a whole village, but getting your game in front of players does not have to be an equally arduous task. There are a number of options for self publishing games with Unity3D.
Getting player feedback as quickly as possible is vital for the game iteration and improvement, especially early on in the development cycle. As such, having a stress free way for your players to engage with your game is ideal. We are going to look at using Amazon Web Services (AWS) to host a Unity3D project and do just that.
Amazon Web Services
Amazon Web Services (AWS) is a secure cloud services platform that offers computing power, database storage services, content delivery and other functionality. We are more interested in the services that allow you to securely store all of your files on the cloud, and host websites.
The Simple Storage Service (S3) of AWS is a service in which we can store objects like files, folders, images, documents, sound files, and much more.
Now, why don’t we go through the required steps to exporting a Unity build suitable for the web.
Setting up Unity
When you are satisfied with the testing of the build within Unity, and it is finally time to export the project:
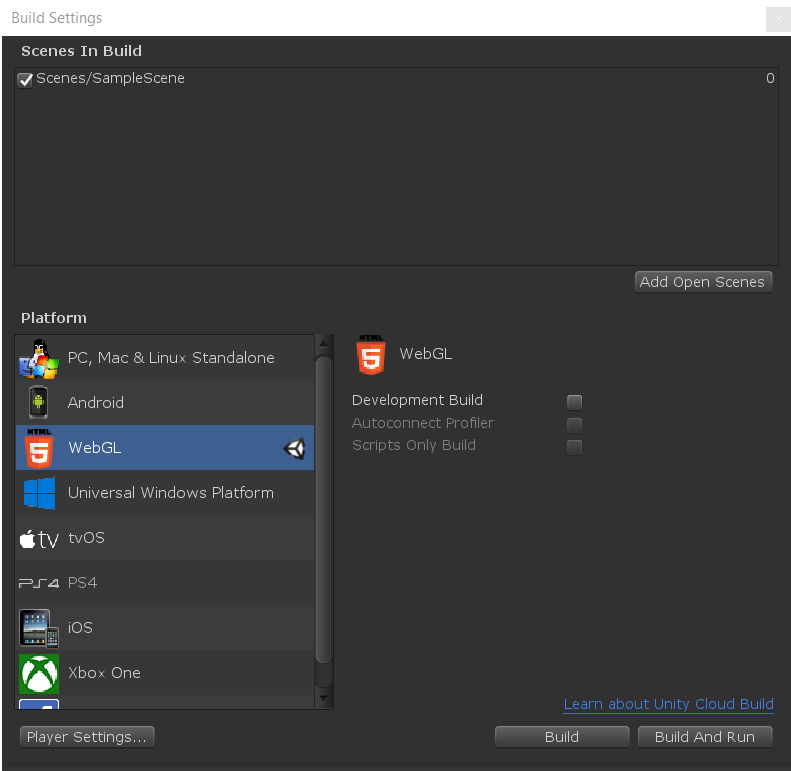
- Select the Build Settings from the File menu.
- Select WebGL as the target platform from the list.
Make sure Development Build is left unchecked
Press the Player Settings button now – or alternatively you can navigate from the Edit menu to Project Settings and then select the Player Category – to confirm that in the Other Settings tab Strip Engine Code is checked. With this option checked, it is usually checked by default, Unity does not include code for any classes you do not use in your project.
Unity will do the rest of the heavy lifting when these settings are in place, and you press the Build button. Alternatively, you can view the project on a browser after the build process by pressing the Build And Run button, as the file will then be temporarily hosted in a local web server and opened from a local host URL.
When the build has been finalised, Unity will create a folder, in the specified location, with the following files:
- An index.html file – which browsers can navigate to load your content. This can be customised to fit the look and feel you would like to capture for your game before it is loaded on to the browser.
- A TemplateData folder – containing the build logo, loading bar and other template Assets. This folder is normally used to customise the appearance of the build while it is loading.
- A Build folder – which contains the generated build output files that Unity required to run your project.
Setting up AWS
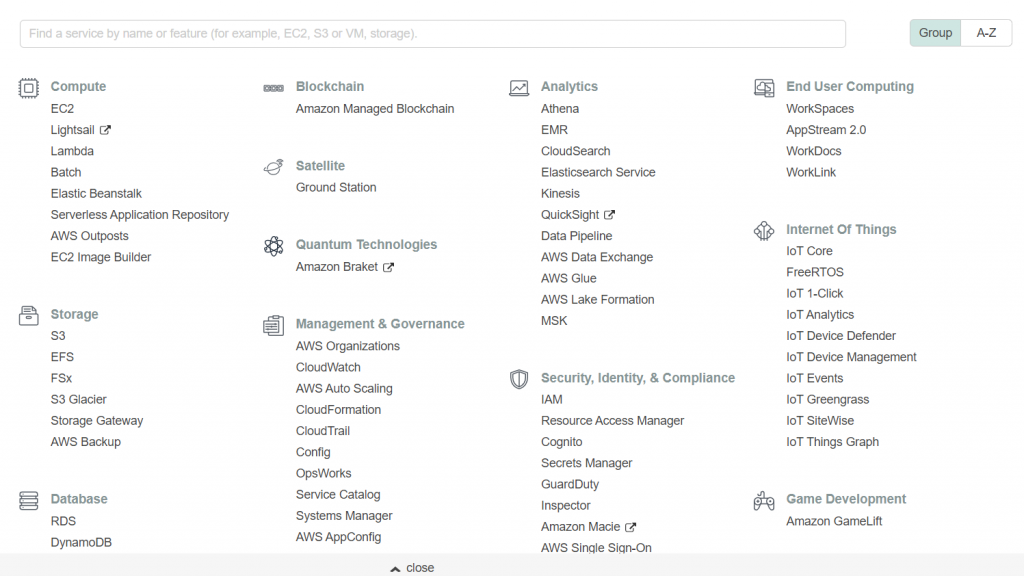
AWS S3 buckets can be used to host a static website, which is essentially what your WebGL project folder from Unity is. To host a static website in the S3 bucket, you need to configure the bucket as a static website. To do this, open AWS and click on the Services menu option and navigate to the S3 link in the Storage submenu. Then create and name a new S3 bucket.
Now that you have created the bucket, you will need to:
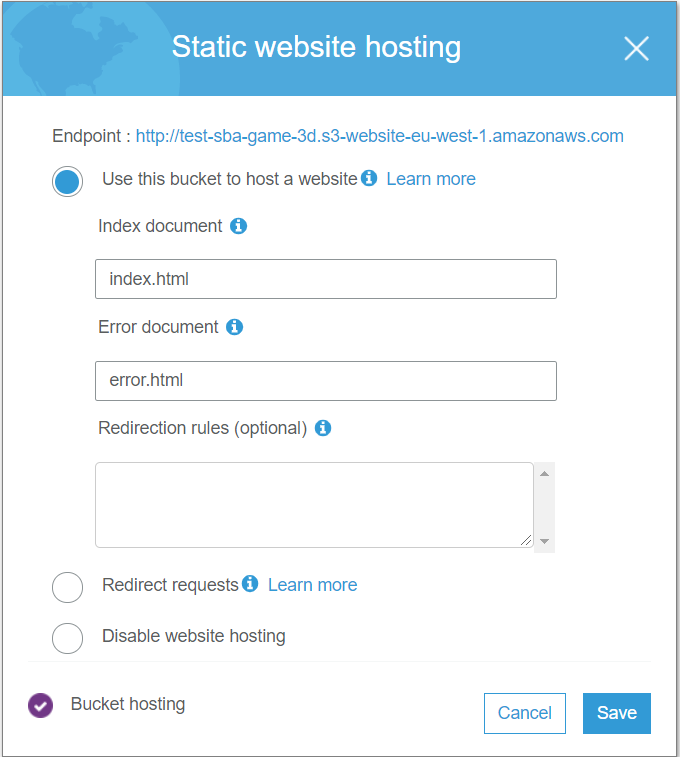
- Open the Static website hosting menu in the Properties tab – which will reveal three options to choose from.
- Select the Use this bucket to host a website option.
- Set the index and error pages as suggested – you should see the index.html and error.html suggestions.
- Save the menu options.
- Select the Permissions tab – edit and unselect the Block all public access options.
Upload the Build Files
With the configuration set for the S3 bucket, you can now transfer your Unity build by selecting the Overview tab of the bucket and pressing the Upload button.
– It is also possible to drag and drop the contents of your Unity folder into the bucket, which may be easier.
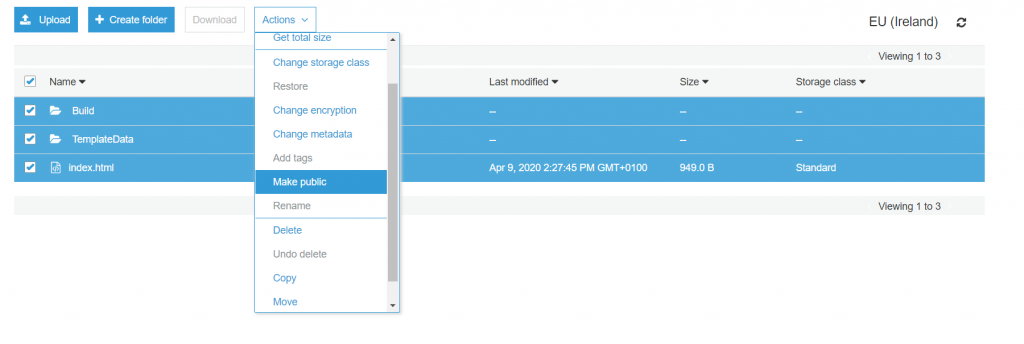
When the upload process is complete, select the files and folders and make certain that they are set to public by clicking on the Actions menu and selecting the Make public option.
Endpoint link
Now if you go back to the Properties tab of your S3 bucket, and open up the Static website hosting menu, there should be an Endpoint link at the top. This is the public link to your now hosted Unity game, that can be accessed from multiple browsers online.
If you are interested in talking to us about what you could do with Unity3D online gaming for your brand or business, feel free to contact us on info@sbanimation.com


