Are you considering producing a Medical Mechanism-of-Action (MoA) animation but are a little unsure about the animation process? Then look no further, here is our insider step-by-step process about what it’s like to work on a MoA animation with us.
Production Process – Medical MoA Animation
Client Meeting
Our first step in a Medical Mechanism-of-Action (MoA) animation is to schedule a client meeting, this is to discuss the project in fine detail, understanding the learning, creative, technical, and business objectives and requirements. Meeting the client face-to-face provides a huge advantage, as we are able to discuss the scope of the project in depth, achieving a greater understanding from the forefront, enabling us to deliver a better results driven, final product.
Schedule
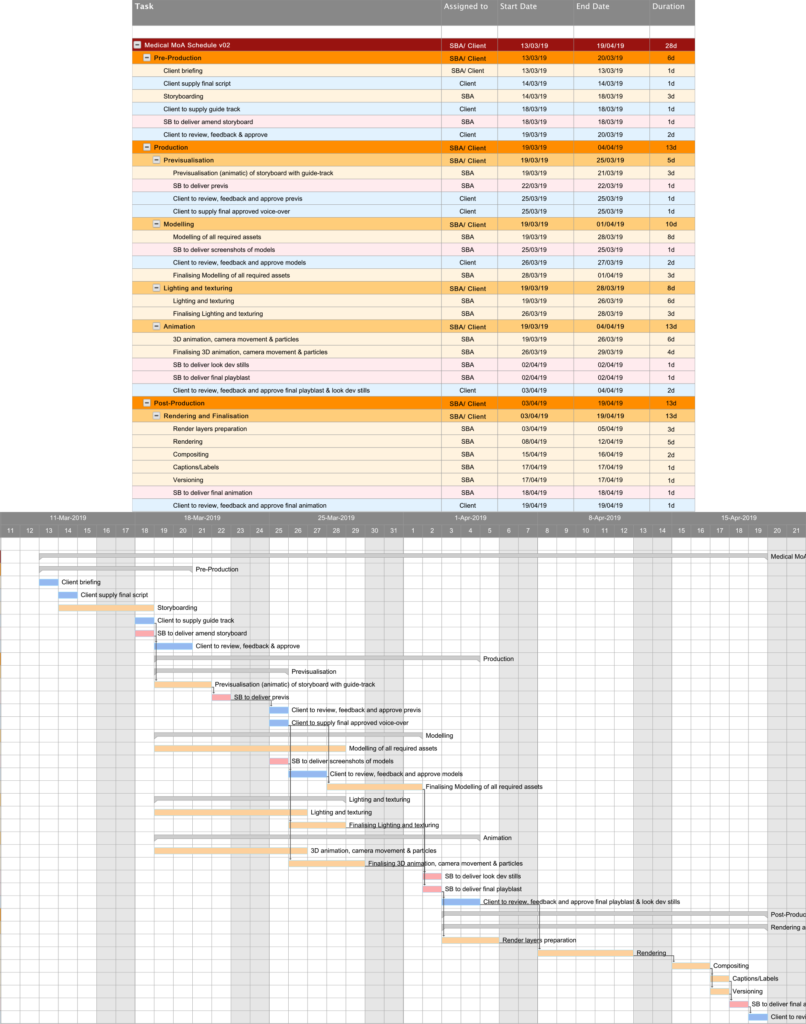
Within this process, we will create a Gantt chart schedule, highlighting key dates and milestones from both ours and the client’s side, regulated on dependencies, for a smooth, efficient production pipeline. An example can be seen below.

Script and Storyboard
Once the scope of the project has been clarified, the next stage is delivery of the script. For a medical MoA animation, the script is created by expert medical writers, we are able to develop these dependent on the client’s specification.
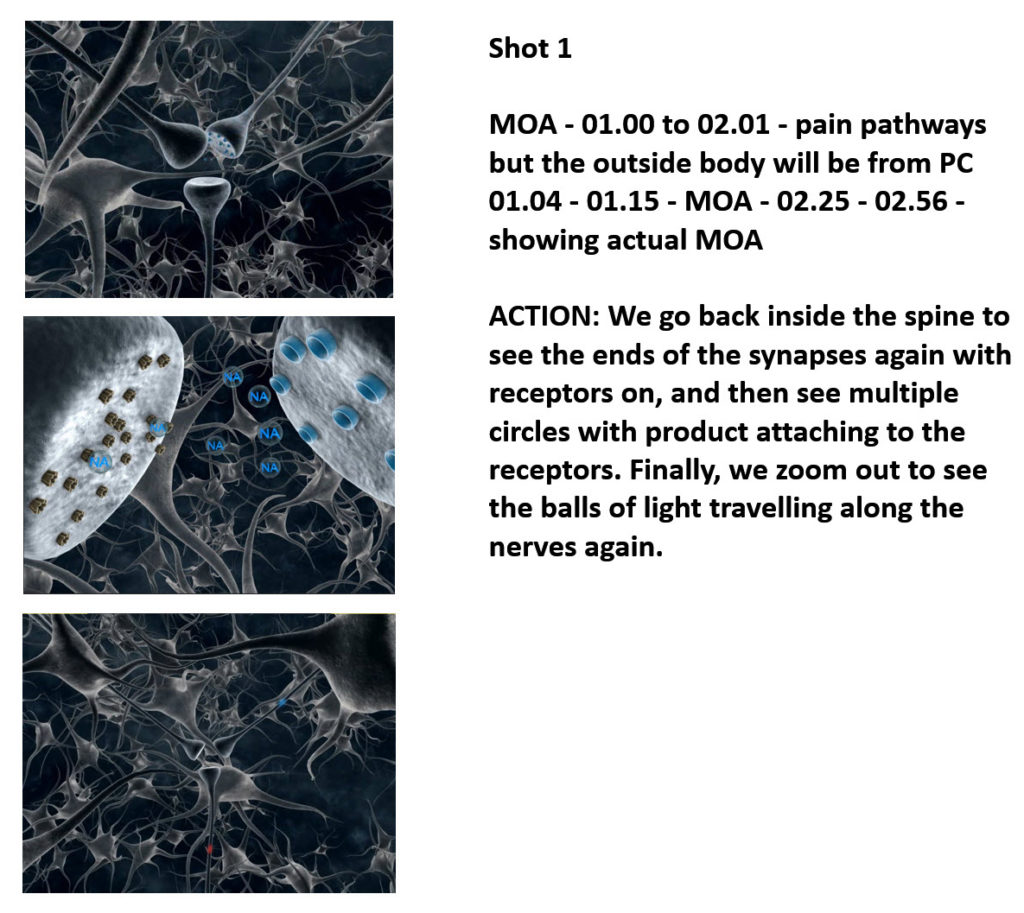
After the script has been approved, we can start developing a storyboard. A storyboard is a sequence of drawings that represent the shots planned for the animation, seen in the example below. This makes the production process smoother, ensuring that no shots or information are forgotten, and every detail has been explicitly included. The storyboard can either be developed by the client or us. If the storyboard has been developed by us, this will then be sent to the client for approval. The storyboard is referenced by the whole team throughout the production, so that we can follow the shot breakdown and story flow.
Top tip: It is important for the script and storyboard to be formally approved before we start production.

Guide Tracks and Voice-over (VO)
Guide Track and VO are the next important part of the production process of an animation (only if your MoA animation requires dialogue) If required, the animation itself is influenced by the VO for timing and focus, creating fluid, coherent motions, leading the viewer around the animation.
A guide track can be delivered at the beginning of production, this would use the final approved script, albeit with an unpolished voice-over and is used as a placeholder until the final approved VO has been delivered and/ or approved.
The final production voice-over is created using the final approved script, performed by the clients chosen artist (or Sliced Bread can also supply the artist and record the VO), the delivery of the final voice-over is crucial, again we cannot deliver a completed animation without this.
Top Tip: If you are unsure on the style and tone voice you are looking for your animation, we can handle this for you. We can supply a variety of different voices, this will just need to be discussed at the beginning of the project, in the client meeting.
Animatic
After the guide track/ voice-over and storyboard has had its final approval, we then create an animatic, this layouts the ‘storytelling’, with a blocked out version of modelling, design, and animation. The guide track or the final approved voice-over will be placed into the scene to show the storytelling, highlighting the camera movement, and timings for the animation. This is not the final look for the animation, but gives the client a visual understanding of the storyboard static images coming to life. This will then be sent to the client to review, feedback and approval.
Asset preparation and animation production
The next production stage in the pipeline is the development of the 3D models and assets, with guidance from reference images and discussions with the client, we start the process of modelling the required assets, delivering work-in-progress (WIP) images on scheduled milestones to the client, for their feedback and approval. Throughout this stage in the pipeline, many other production processes are taking place, such as, rigging, animating, texturing/ shading, these sculpt the final product, all working as a family and team. Once again, sending WIP images and playblasts (pre-renders) to the client for their feedback and approval.
You are also more than welcome to visit us in the studio at any point to see how the animation is developing.
Final pre-render and look dev.
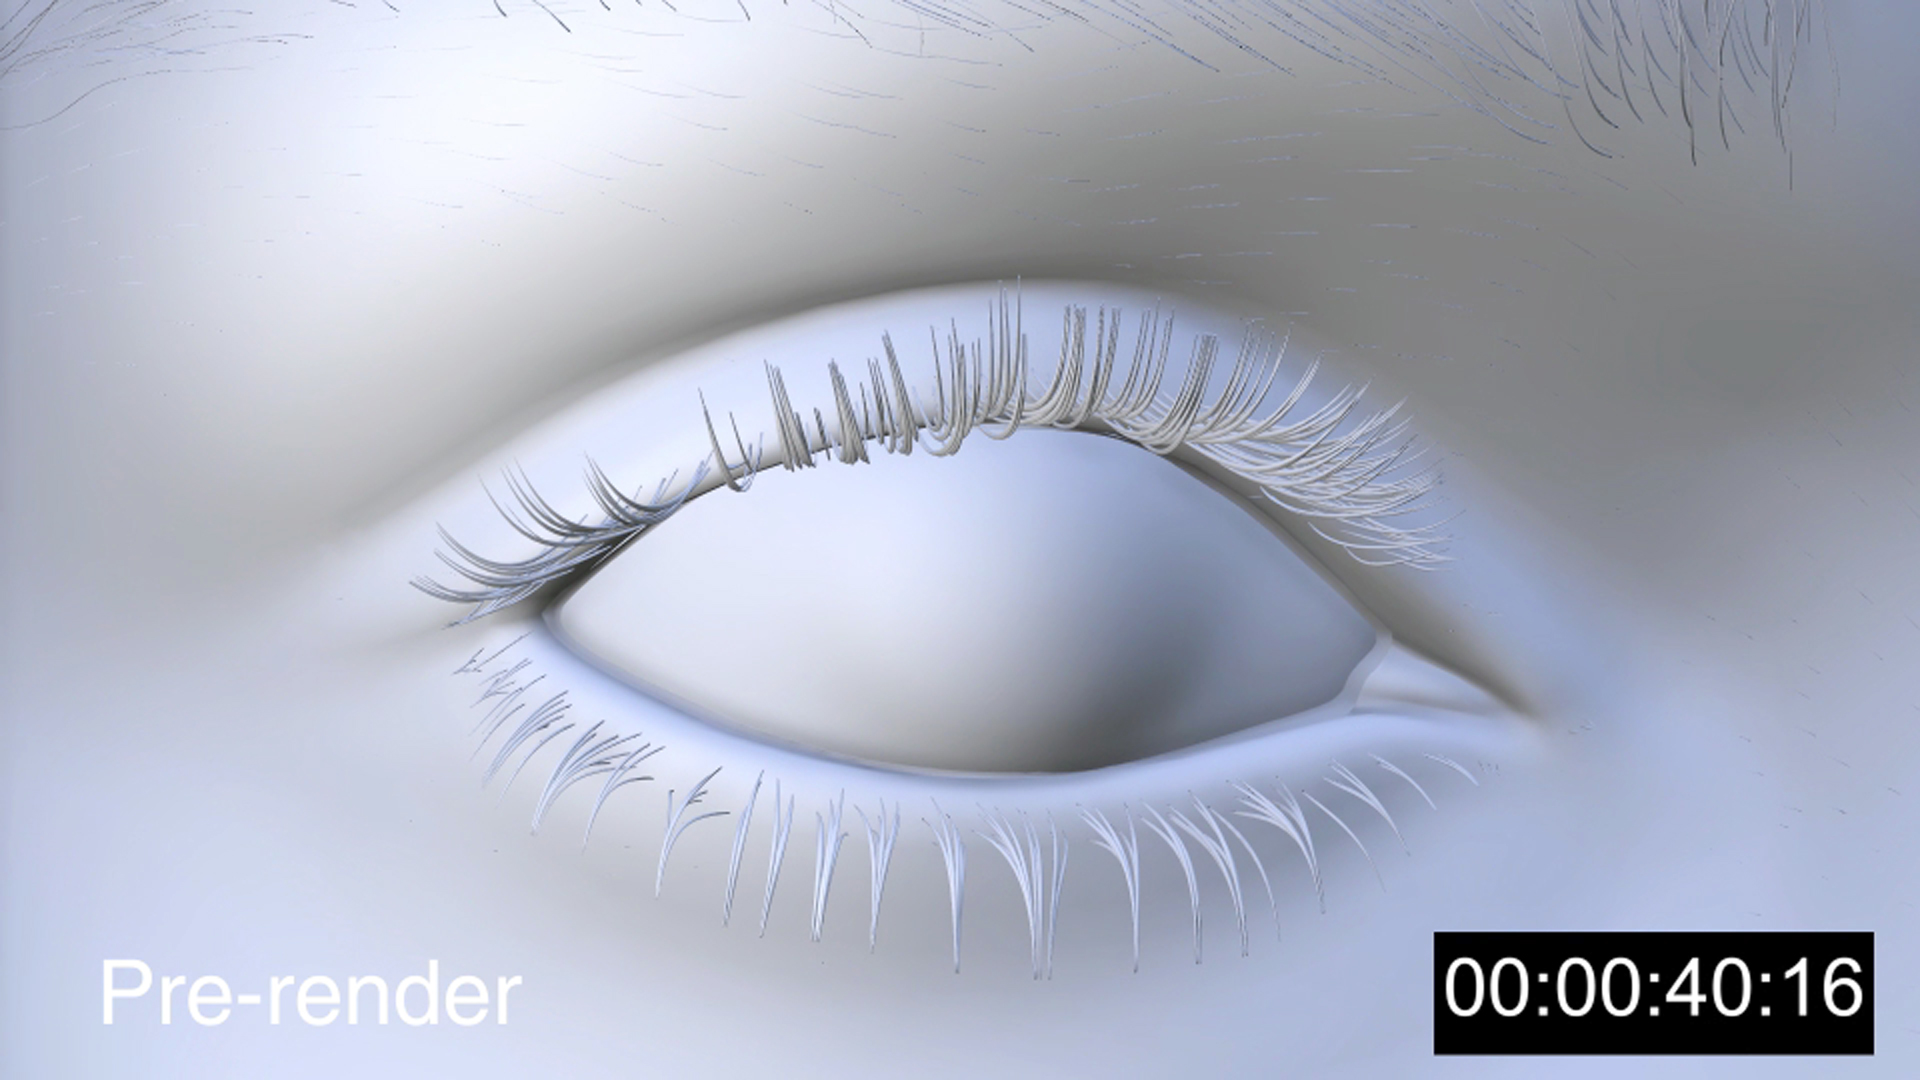
Once the animation has been completed (with internal and external milestone reviews), the pre-render (which can be referred to as the final playblast animation) is sent to the client for final approval. Pre-renders are a quick preview of the final timings, camera movements and animation for that specific shot, these are either coloured in grey or in blocked colours. Which you can see in the image below.

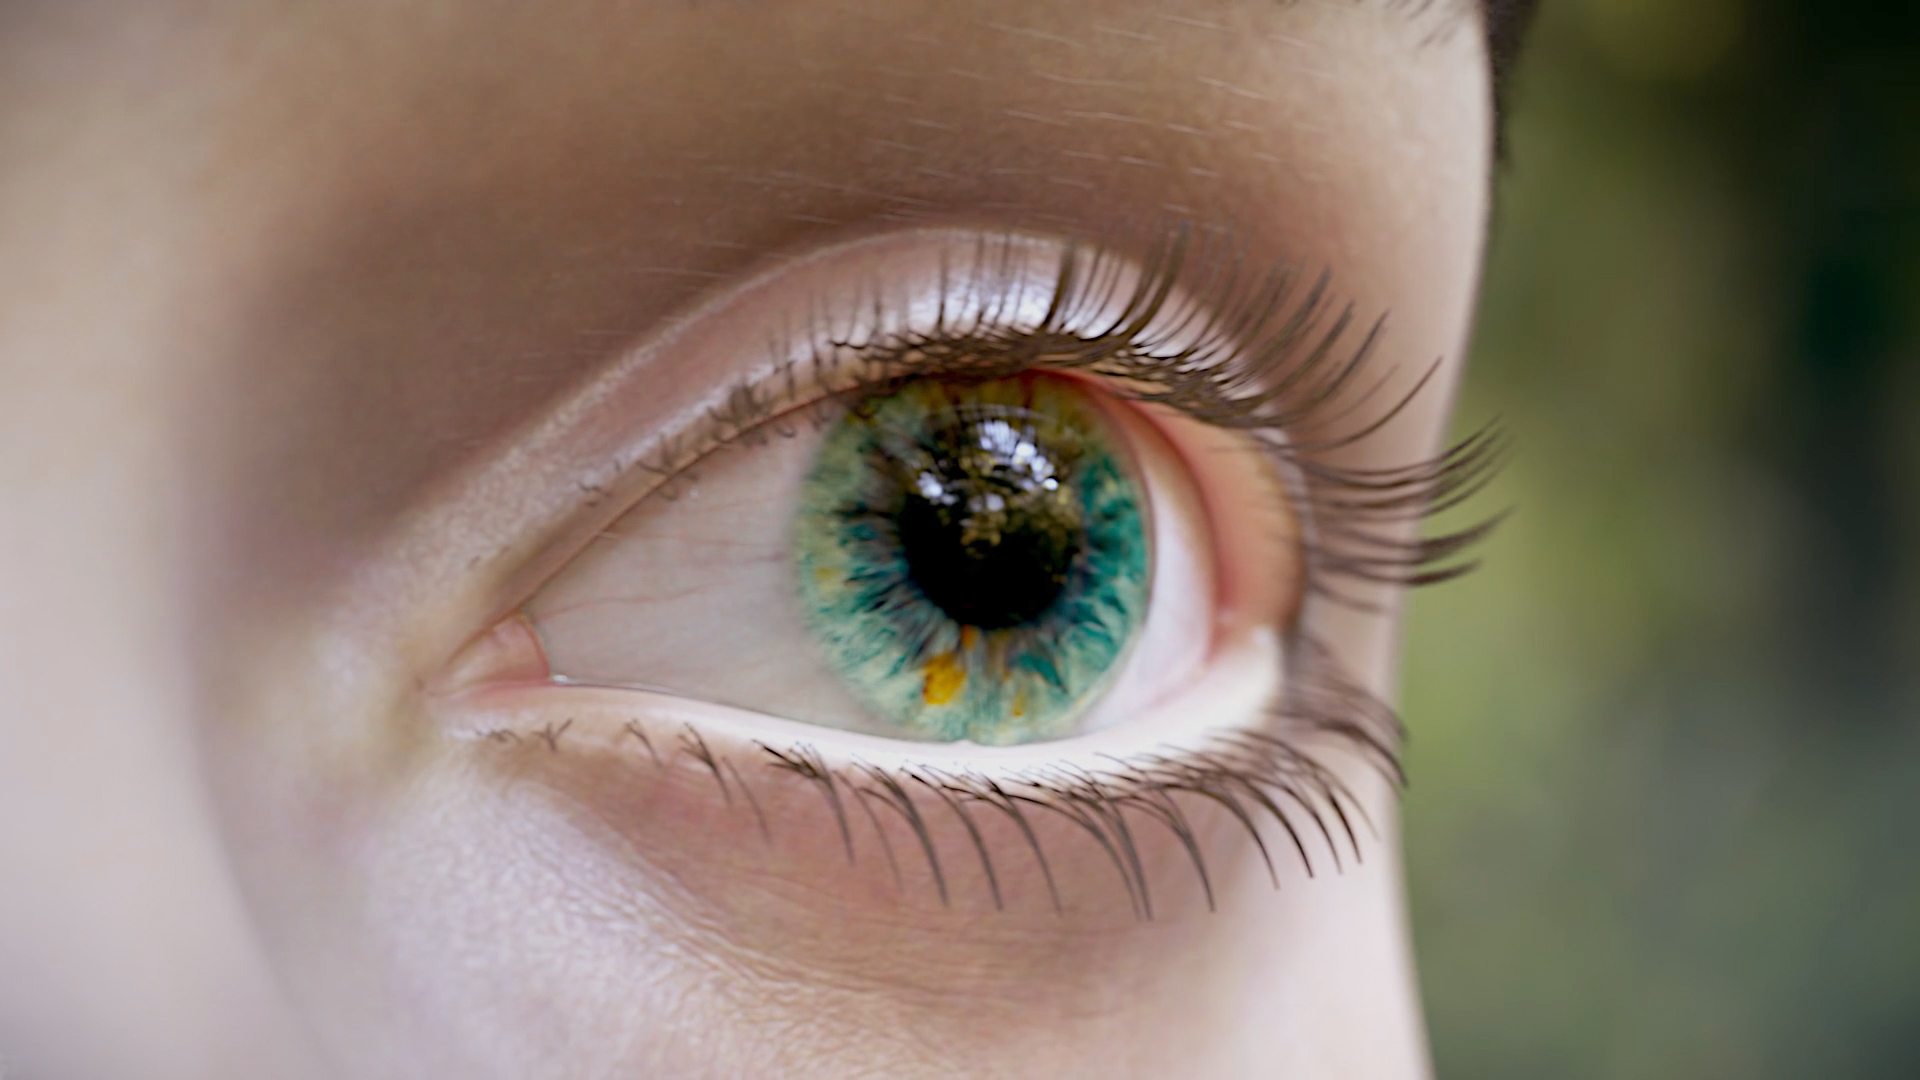
Alongside this, will be the delivery of a varied selection of final look dev (development) frames. This is a ‘snapshot’ of the scene fully rendered, it is a very exciting time in the production process, as you are able to see your models and scene take shape, and the story you are telling begins to fall into place. The look dev frame will consist with all textures, shading, lighting, depth of field and even compositing. Which you can see in the image below.
Top Tip: This stage in production pipeline is very vital, we can’t start the rendering the animation without the final approval of the animation playblast and look dev.

Final Stages: Rendering and Compositing
Once the final animation and look dev frames have been approved, we are able to start the rendering process, which is the automatic process converting 3D models into 2D images. This may sound straightforward, however, this process can take a matter of days/ weeks, depending of the scale of the project. So patience is key for this part.
After the completion of rendering, there is a secondary process in making the final animation ‘picture perfect’. The final stage is compositing, which is the process of combining all visual elements together, to create the final piece video (this might include the depth of field, colour grading etc.). We are also able to include extra requests for example, captions, labelling, and subtitles, we would have to discuss this in the client meeting and included it in the schedule.
After this, we then send you the animation for your final approval. If you have any final amends we will complete these for you within an agreed amount of days, and then re-submit. Once you have confirmed that you are happy, and give us your final approval we will supply you with the HD renders of the animation and any other required versions, for use at your event, on TV, your website, intranet, social media, YouTube etc.
If you’re interested and seeking for advice and/ or information about how we can help you create a Medical MoA Animation, contact us here.
Recent Posts

Are You Using The Best Type Of Content For Your Business?

How Animated Storytelling Can Benefit Your Business

Our Experience at Develop:Brighton 2025 – VR Pipeline Essentials And A Day of Industry Insights

Create a UI Magnifier in Unity (URP) Using a Second Camera

VR Cooking: Learning By Doing In VR For Students

Communicating Organisational Change With Animation

Using VR To Explain Medical Conditions And Treatments

Is Your E-Learning Changing Behaviours or Just Ticking Boxes?

Make Them Laugh With Internal Communications

The Benefits Of Using An Expert Medical Animation Studio