Looking to make your own Augmented Reality (AR) application, and would like to integrate 2D and 3D into your application but unsure on how to create Target Images? Vuforia Developer is the software for you.
Now what is Vuforia Developer you say? Vuforia is an augmented reality software development kit (SDK) for mobile devices that enables the creation of augmented reality applications. It recognises Image Targets through computer vision technology, in real time, processing information and data creating a 3D model and placing it in the real world. Basically magic.
Vuforia can be very straightforward, only if the specific requirements have been met. Vuforia recognises the distinct flat target image/ shape in an environment, and will set up in the x-y-z coordinates, then renders on the virtual 3D model. The user will be able to view the 3D rendered object from almost any angle, whether being near or far away from the radius of the trigger, whilst the user moves around with the device. This creates an illusion and feeling that the user is now part of the environment, successfully merging real life and computer-generated imagery together.
Below is a step-by-step process on how to create the whole process of an Image Target trigger.
You will first need to create a Vuforia Developer account, please visit here to sign up and register.
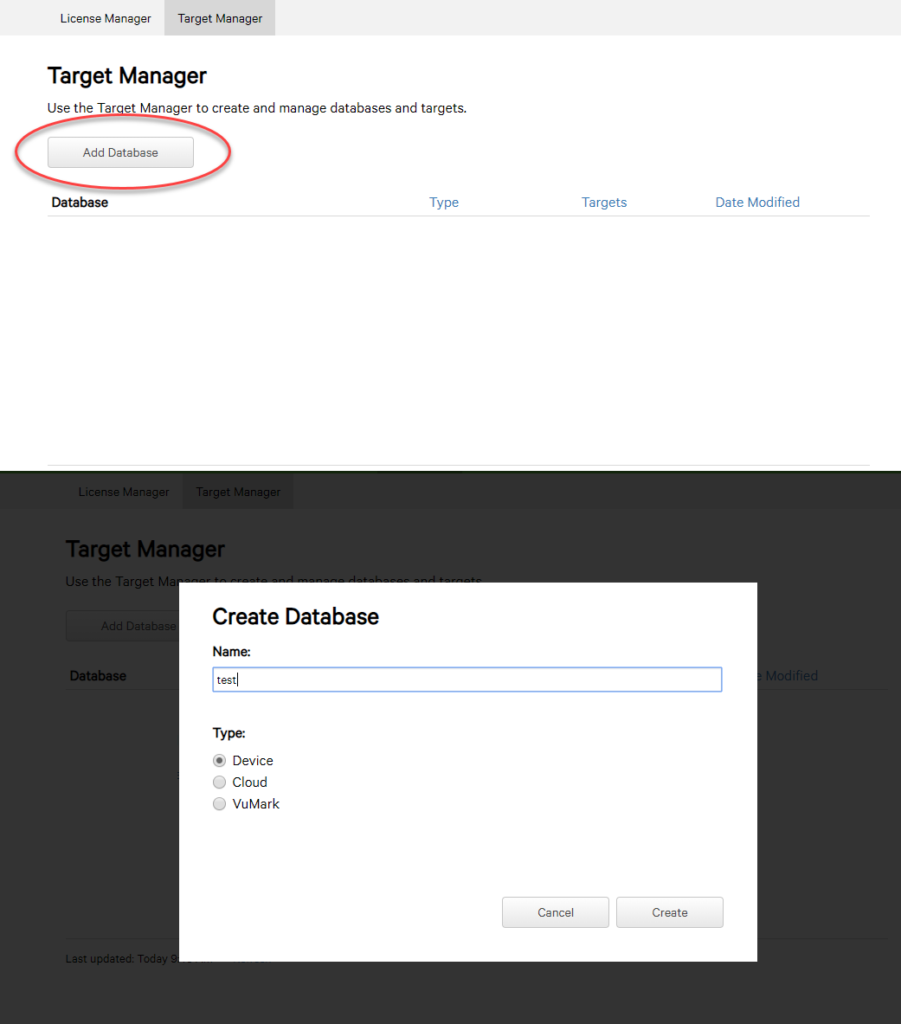
Creating a Database
Click Develop and navigate to Target Manager.
To create a New Database, this creates a folder for where your specific target will be stored and easily accessible and editable.
- Tap ‘Add Database’
- Name: Give your database a name (this can be changed later)
- Type: Tap ‘Device’
- Tap ‘Create’
After the database has been made, you are able to upload your trigger images to be processed and stored within the database.
Creating a Trigger Image
To create a Trigger Image, which is an image that Vuforia engine can detect and track, resulting in showing your desired 3D object – for this tutorial we are focusing on only a Single Image target, for more information about other target types, click here.
- Select the desired database by clicking on its name in the Database List, within the Target Manager page
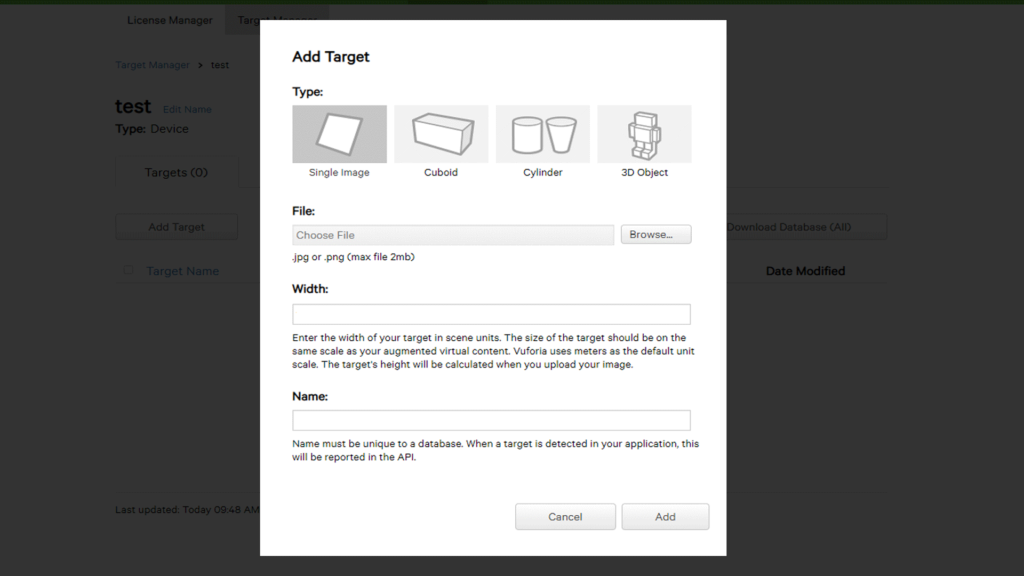
- Click the ‘Add Target’ button
- In the ‘Add Target’ window which appears, use the following settings:
- Type: Single image
- File: Tap ‘Browse’ and select your image file (JPEG or PNG format) or drag and drop. Note: .jpg or .png (max file 2mb)
- Width: Enter the width of the target in the scene units. (The size of the target shall be relative to the size of the augmented virtual content.)
- Name: Enter a name for the target, this name must be unique within the database.
- Tap ‘Add’
Once the image has finished uploading you will see your newly added target in the Target list for the selected database.
Top Tip: For a good Trigger Image, the more detail in the image the better.
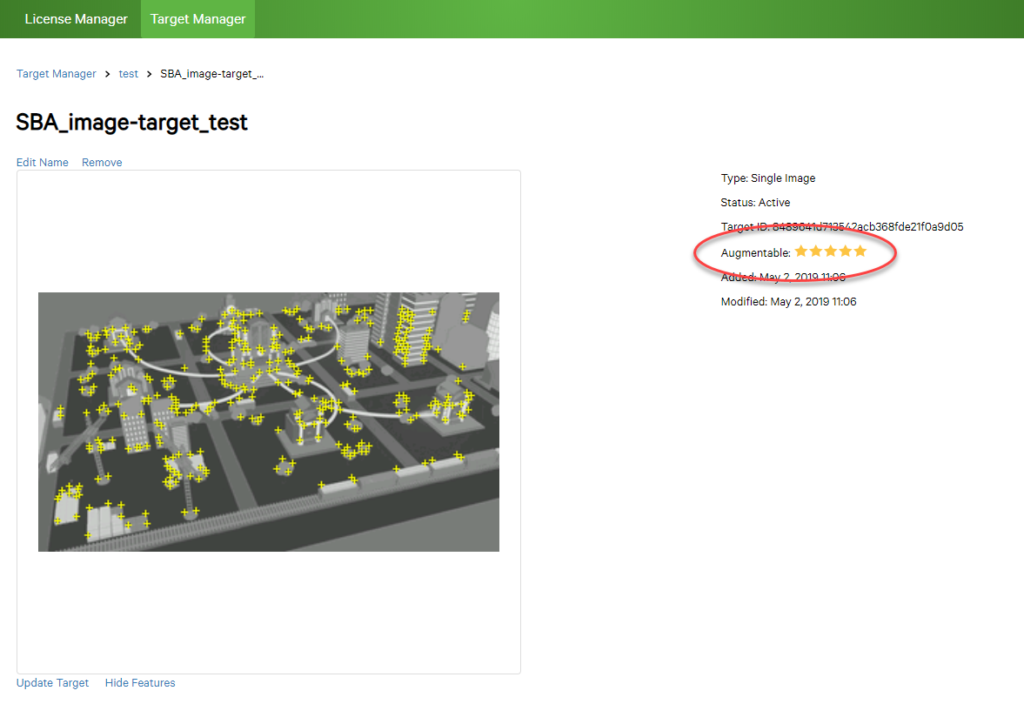
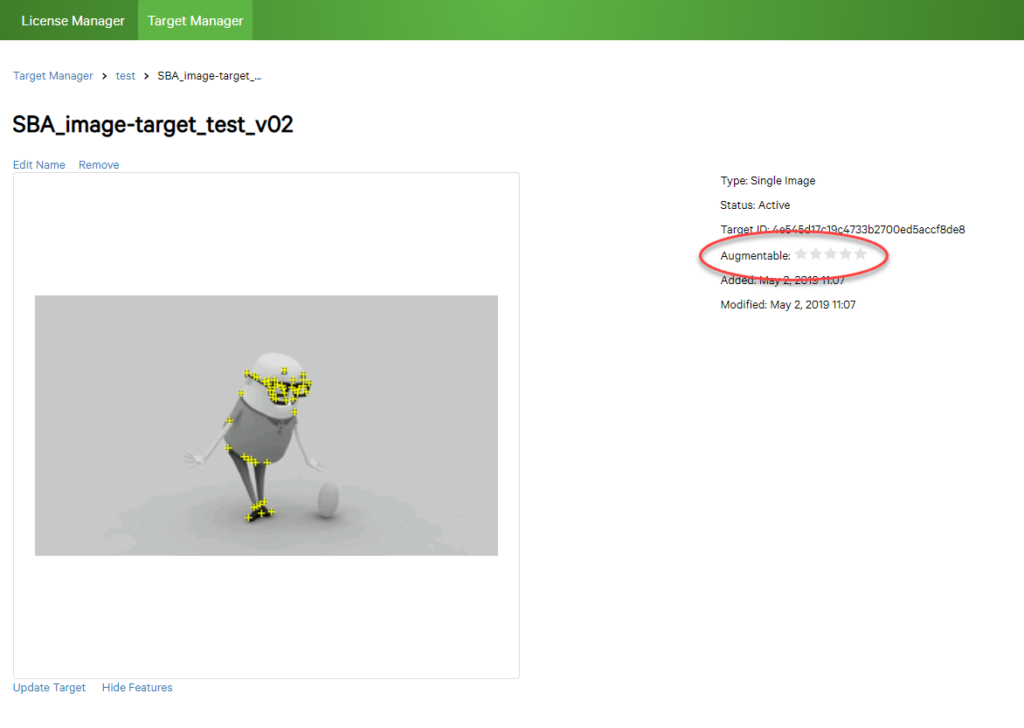
Vuforia detects the images based on it’s features, basically the level of detail. Vuforia creates a rating system for the image, ranging from 1 – 5 stars. The richer the detail, the higher the star rating however, with missing points of contrast and less repetitive patterns, the lower the star rating. Nonetheless, all stars are trackable, the higher the rating, the 3D object will be clearer and not ‘wobble’. The lower the rating, the harder to track and the 3D object will begin to wobble as lose focus.
Image above shows a 5 star rating image, rich in detail, good contrast and no repetitive patterns.
Image below shows a 0 star rating image, points of contrast are only focused on the middle and low contrast, may possibly create a wobbly effect.
To view the feature details of the target image, click on the image and below should show a ‘Show Features’ button, click that and it will show the image in black and white with yellow points, indicating the level of detail.
Read more here, about star ratings and tracking stability.
Downloading Target Database
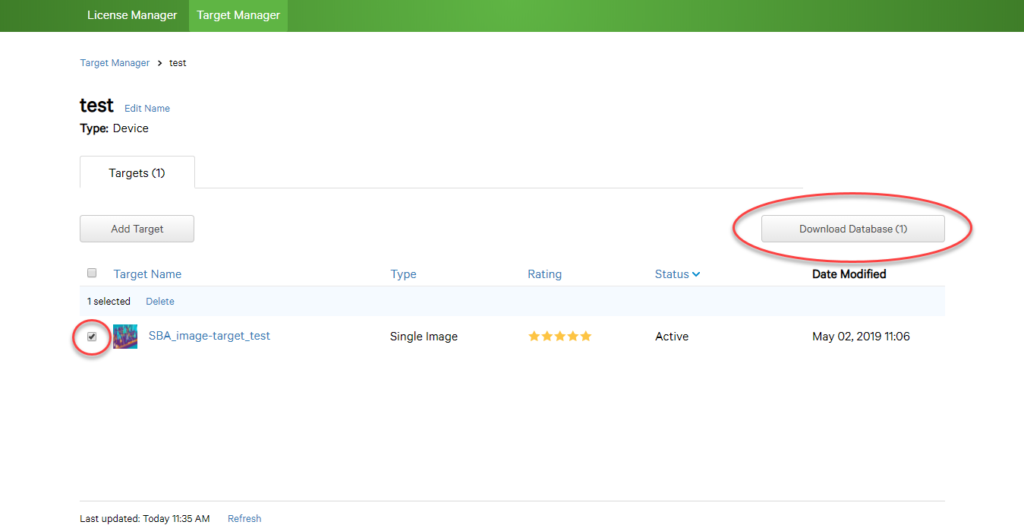
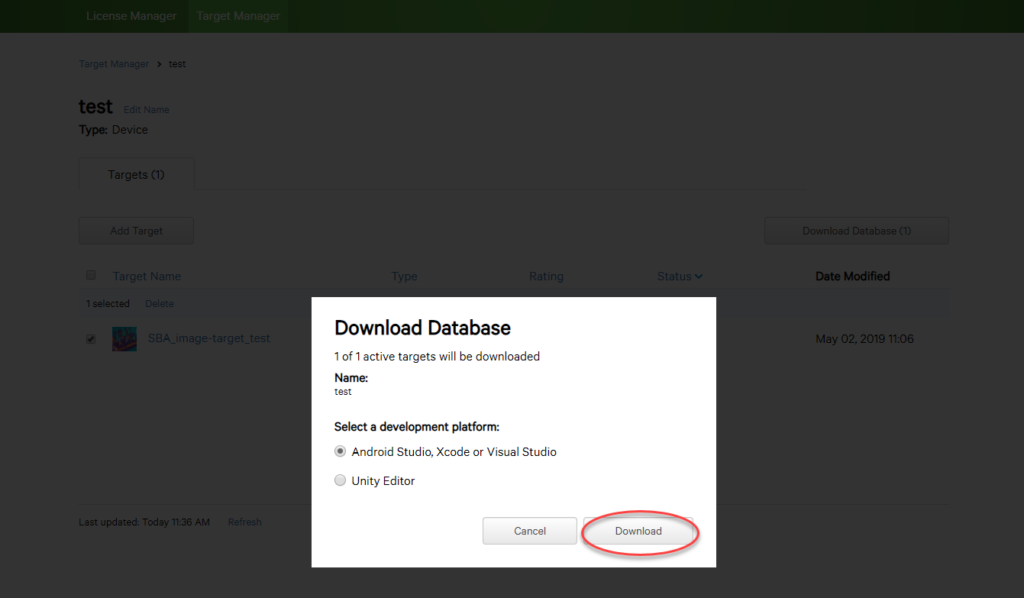
- Navigate to the Target Manager page, select the database which contains the target you wish to download.
- In the target list for the database, check the box next to the desired target.
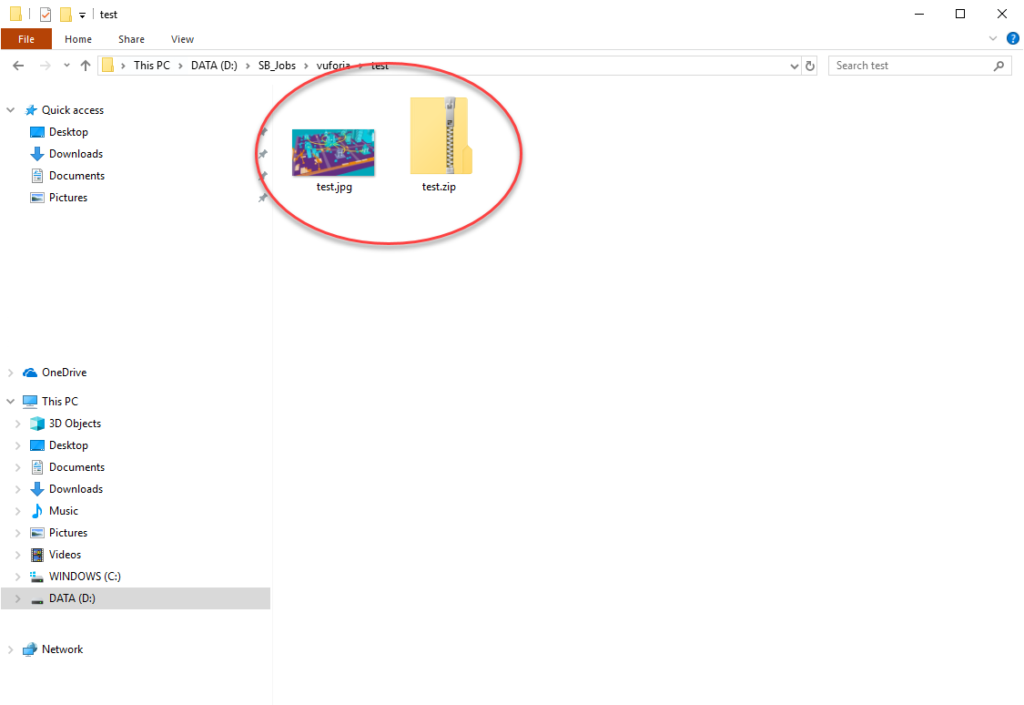
Note: Only a single target is checked, tap the ‘Download Dataset’ button above the target list.
If you’re interested in how we can help you create an Augmented Reality application, contact us here.
